

Sunday, August 14, 2011


Friday, August 5, 2011


Wednesday, August 3, 2011
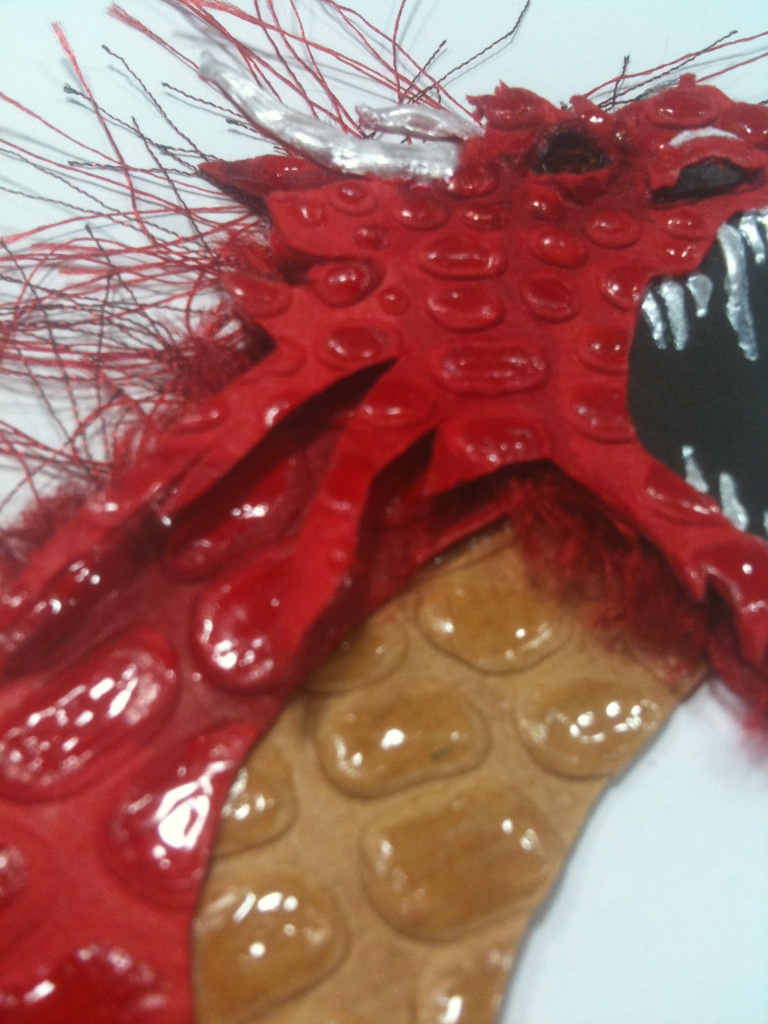
DRAGON PAPER PIECE
So I decided to scrapbook one of my son's school pictures. This one has a white background and he is sitting on the floor. All I can see is his red tshirt. I had no idea how I was going to scrapbook this photo. One day I was looking at his shirt and saw little dragons on it. AHA! I'll do a dragon slayer theme. Since then I have been looking for a dragon to paper piece. I have those wonderful Paper Studio textured papers that I thought would make an awesome dragon. I could not find the dragon I wanted. I looked everywhere like google,clipart,svg,images etc. I decided to save some of the dragons I liked and combine them into one. I used the wings of one, face of another and body of another. Printed them out on my printer and then taped the body parts together. I traced the image onto a piece of white cardstock then cut that out. I used that for my template as the cardstock is heavy duty unlike typing paper. It was a little difficult tracing and cutting the textured paper but well worth the effort. I'm trying to make it 3D like so I'm layering as much as I can. I used the red and tan textured papers. I had some diffuculty with the tail but it will do. I wanted the wings to look as realistic as possible so I used transparent vellum.

Last night I glued on as many pieces as I could. I used Tulip pearl puff paint for the claws of the wings,hands and feet. Since the dragons wing will bend down to cover my sons picture I had to make the wing 2 sided so I had to have 2 wing templates. When you open the album to view the page you will have to lift up the wing to reveal his picture. Tonight I will do the claws on the other side of the wing. Oops I need to do the other wing too. Oh well. I'll have to do that tonight as well. I just gotta figure out how to do the teeth. I will probably do it in the Tulip pearl paint as well. Just a little scared I might mess it up. I will try to use a small thin brush and paint it on there. This has been fun so far. Can't wait to finish it and post the completed picture. Oh and I'm bad at not saving my templates. I end up cutting them up for smaller layering templates....my bad? I suppose if anyone wants it I could reproduce it. Just let me know.
Blessings to everyone!
Sunday, July 24, 2011
WEDDING GIFT IDEA

Finished product
So I wanted to make my friend something special for her wedding. I wanted it unusual and functional. This is what I came up with, This is a glass cake stand. My friend loves my chocolate chip cookies so I made cylinders and put my cookies in there. I decorated each cylinder with either a wedding gown, tuxedo or dragonfly (she loves dragon flies). Her wedding was done in black,white and red roses. I topped each cylinder with red roses. I placed the glass dome on top then topped that with black ribbon and more red roses. I made a simple card and explained to her if she returns the roses and decorations I will make her second gift. My plan is to make her a shadowbox utilizing these decorations and showcase her invitations and a spot for a 4x6 photo. I tried to post some of the steps below of what I have done. I have included tutorials from Penny Duncan.
Blessings,
.
DRAGONFLIES AND BUTTERFLIES

Dragonflies I learned from Penny Duncan Here is her tutorial on that. http://www.youtube.com/watch?v=0aPuaqWVbRE&feature=player_embedded


Thanks to Penny Duncan I made these red roses. They were easy to make. Just a little time consuming as I had to make around 25 of them. I carried them with me to the park and doctor offices to make them. Here is the video she made. Just copy and paste onto browser or click on it. http://www.youtube.com/watch?v=LLrowwWGvuI&feature=player_embedded

I printed these tuxedos out with my cricut. I used glossy glue to high light the collar. I realized after I wrapped the gift I forgot to put on the bow ties. There was no way I was going to unwrap all that just for bow ties.
As you can tell the tux has 3 layers. I stamped some black ink on the layer under the top so that there would be a little more of a darker shadow to show where the arms were bent.


This is one of the simple cylinders I made out of Bazille paper. I love the texture on this paper. I was able to place 4 cookies in each cylinder. I made 3 cylinders each of red,black,white and green. I folded the edges inward and cut circles out to glue on the bottom and top of each cylinder. The cylinders measured 6Hx8.5.L.
Tuesday, April 26, 2011
Skillet logo

My son loves the Christian rock band Skillet. I repainted his room green (his favorite color) and then I painted a faint white cross on the wall. I found the skillet logo and changed it into an SVG using inkscape. I then cut it out on white vinyl and blotted some green paint onto the letters. I then placed the letters across the cross. It looks like a vertical glare but it's actually the white paint. It turned out pretty good. He loves it.
Thursday, March 24, 2011
Words With Friends Thank you card
While my husband was in the hospital recovering from heart surgery I played a game called Words With Friends on my phone. This one person I work with played the game with me alot. This kept my sanity. I thought I would do a Thank you card for her. It was perfect. The picture does not do it justice but it was fun putting together. She loved it. Notice the letters on the bottom say "stupid". I'm always joking to her and saying stupid. I thought her letters of choice would be cute to say stupid.

 As you can tell the inside of the card is very plain. Maybe because I spent so much time on the outside. I made the front cover using SCAL on my cricut. Very easy to do. Still have not had time to figure out how to make SVG file to give away. One day I will learn it. Blessings, Susan


Thursday, March 3, 2011
Frugal ideas
While at work yesterday I found some of those small hand spray sanitizers in our drawer. There was lots of them that an ambulance service had given us. They look just like Tim Holtz spray bottles. I took 8 of them home and emptied them into my hand sanitizer and used the bottles to make my sprays. He he I was so excited.
Another thing is the Cricut mats. I've decided to buy the 12 x 24 size. My thinking is I get 4-12x12 mats for $15 instead of buying the regular 2-12x12 mats for $10. I don't cut it which kinda makes it cumbersome when working with 12x12 papers but hey...it saves money!
Another thing is the Cricut mats. I've decided to buy the 12 x 24 size. My thinking is I get 4-12x12 mats for $15 instead of buying the regular 2-12x12 mats for $10. I don't cut it which kinda makes it cumbersome when working with 12x12 papers but hey...it saves money!
Friday, February 25, 2011
Paper Studios decorative papers

Thursday, February 17, 2011
Frank's surgery scrapbook pages

I chose to do his pages in orange,brown and turquoise.


Monday, January 24, 2011
Valentine Box
I made these little boxes for the kids to decorate for cupid. It was very easy and quick as you can tell looking at the pictures. I have not decorated it yet but still thought I would post it for you to see. I traced the image with tracing paper onto red Bazille paper then cut it out. You might want to use a heavy cardstock for durability. I scored the paper for easy folding. Then glued it together. Soooo easy. I was thinking of adding a ribbon handle and we could hang then. I tried to make it into an SVG but I'm not that talented enough yet to do that. I did try though. If somebody does convert to SVG please send me a copy. Thx and blessings.


Subscribe to:
Posts (Atom)